A Growing Guide For Amaryllis

Amaryllis (Hippeastrum) is a popular flowering plant known for its stunning, trumpet-shaped blooms that come in a variety of vibrant colours. Some of you (me included!!) might be old enough to remember grocery stores bring full of boxes Amaryllis kits at Christmas, ones that contain a plastic pot, a small scoop of soil, and a brown bulb that leaves you wondering if ANYTHING will come of it. Every year, as a child, my father would have me choose one of these colourful boxes at the grocery store, and we would gift it to my grandmother (his mom). Grandma and I would pot up that bulb together, and January was FULL of excitement as we checked on the Amaryllis daily. I have such vivid memories of watching the stem grow and grow (we would measure it at its peak every year), and the incredible eruption of colours blooms that would unfold in the late winter, from that unassuming brown bulb.
Needless to say, I was hooked on growing Amaryllis indoors in the winter from a young age! It remains—in my opinion—an underrated holiday flower. Not enough of us are enjoying these beauties indoors over the holidays, so consider this little amaryllis guide my attempt to pull you all into growing this bulb! If you haven’t tried it before, then I’ve let you in on a secret pocket of winter joy, that you can thank us for in January!
With proper care, Amaryllis bulbs can produce multiple flowers and bring a burst of colour to your home during the winter months. In this guide, we’ll walk you through the step-by-step process of growing Amaryllis, from selecting the right bulb to enjoying its magnificent blooms.
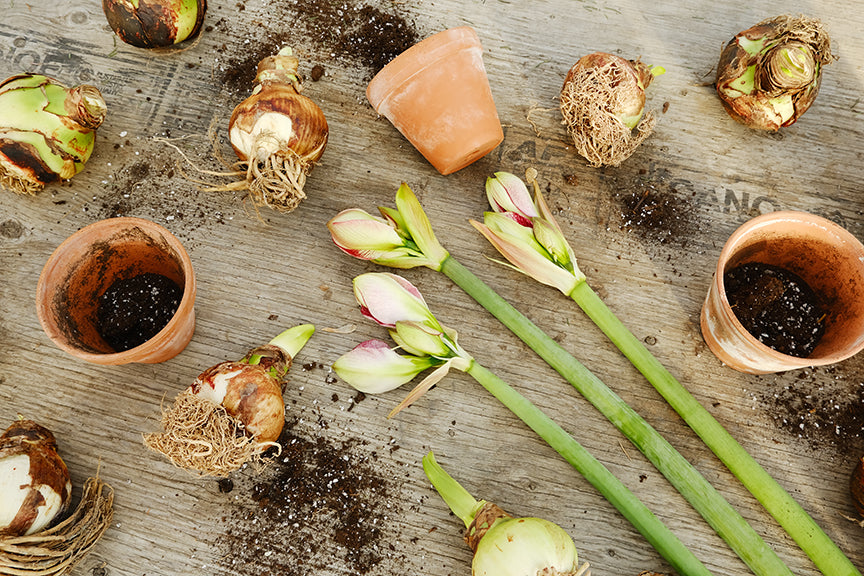
1. Choose a healthy bulb:

Select a large, firm bulb that is free from any signs of damage or disease. The bigger the bulb, the more flowers it will produce. Like eggs, amaryllis bulbs come in ‘grades’, so to speak, and this is an occasion where bigger IS better. Grocery stores often have smaller B and C grade bulbs (these still produce very good plants!), and independent garden centres and specialty flower shops/farms typically have grade A and A+ extra large bulbs (these are more expensive, but truly spectacular and totally worth the price!!!).
2. Select a pot:

Use a pot that is at least 6-8 inches in diameter and has drainage holes at the bottom. Amaryllis bulbs prefer to be slightly root-bound, so choose a pot that is not too large. We love clay pots for the look, and the drainage, but plastic gets the job done as well. Just ensure that you have good drainage.
3. Prepare the potting mix: Use a well-draining potting mix that is rich in organic matter. You can also mix in some perlite or sand to improve drainage. Garden centres typically always have small bags of high quality potting mix.
4. Plant the bulb:

Place the bulb in the pot, leaving about one-third of the bulb above the soil surface. This part is important, your bulb doesn’t want to be fully buried, which always does feel slightly counterintuitive. Trust us on this, though! Press the soil gently around the bulb to secure it in place.
5. Water the bulb:

Water the bulb thoroughly after planting, allowing the excess water to drain out of the pot. Amaryllis bulbs prefer to be kept slightly moist but not waterlogged.
6. Provide proper light and temperature:

Place your pot in a bright location with indirect sunlight. Amaryllis bulbs prefer temperatures between 60-70°F (15-21°C). Avoid placing the pot in direct sunlight (no hot, sunny windows) or near heat sources.
7. Support the growing stem: As the bulb starts to grow, it may need support to prevent it from toppling over. Stems often grow 12-30” (30-76cm). You can use a stake or a decorative support to keep the stem upright. Add support early if possible, it’s always so disappointing to wake up in the morning to an amaryllis that has taken a surprise topple overnight!
8. Water and fertilize regularly:

Water the bulb whenever the top inch of soil feels dry. Fertilize the bulb every 2-4 weeks with a balanced liquid fertilizer (something like a 10-10-10 or a 20-20-20, or similar), following the instructions on the fertilizer package.
9. Watch for flowering:

Amaryllis bulbs usually take 6-8 weeks to bloom after planting. Patience is a virtue here, and you’ll definitely be rewarded! Once the flower buds start to appear, reduce your watering slightly to prolong the bloom time.
10. Enjoy the flowers:

Amaryllis bulbs produce large, showy flowers that can last for several weeks. Truly, they are spectacular! And better yet, large bulbs often produce 2-3 stems of blooms, extending the bloom period! Once the flowers fade, you can cut off the flower stalk and continue to care for the bulb as a houseplant.
After an Amaryllis has finished blooming, it will enter a period of dormancy. Here are some care tips for this stage:

1. Remove the spent flowers: Once the flowers have faded, cut off the flower stalk near the base of the bulb. This will prevent the plant from wasting energy on seed production.
2. Continue watering: Even though the plant isn’t actively growing, it still needs some water to stay hydrated. Water the bulb sparingly, allowing the top inch of soil to dry out between waterings.
3. Reduce fertilization: During the dormant period, your plant does not require as much nutrients. You can reduce the frequency of fertilization to once every 4-6 weeks or stop fertilizing altogether.
4. Provide cool temperatures: Amaryllis bulbs benefit from a period of cool temperatures during their dormancy. Place the pot in a cool (50-55°F or 10-13°C), dark location such as a basement or garage. This will help stimulate the bulb to enter its next growth cycle.
5. Allow the foliage to die back naturally: The leaves of the Amaryllis will gradually turn yellow and wither away. This is a normal part of the plant's dormancy process. Don’t remove the foliage until it has completely died back on its own.
6. Repot the bulb (optional): If your Amaryllis bulb has become overcrowded or outgrown its pot, you can repot it during its dormant period. Remember, you’ll want to choose a pot that is just a bit larger than your bulb, but not too big! Your plant doesn’t like too much extra space in its pot. Wait until the foliage has completely died back before doing this.
7. Prepare for the next blooming cycle: After a period of dormancy, the Amaryllis bulb will start to grow again. Around 6-8 weeks before you want the plant to bloom, bring it out of its cool, dark location and resume regular watering and fertilization. As long as your bulb still feels firm and solid (not soft and squishy, or hollow at all), it will be ready for a new cycle of growth. Typically we bring our bulbs back out of storage in October, in hopes of winter holiday blooms. Place the pot in a bright location with indirect sunlight, and begin to resume the first set of steps, as far as watering and care goes.
By following these care tips, you can help your Amaryllis bulb rest and rejuvenate during its dormant period, preparing it for another round of beautiful blooms in the future.
Growing Amaryllis is a rewarding winter experience, that allows you to enjoy the beauty of its vibrant blooms at an otherwise cold and dark time of year. By following the steps outlined in this guide, you can successfully cultivate Amaryllis bulbs and create a stunning display of colour in your home. With proper care and attention, your Amaryllis will continue to delight you with its magnificent flowers for years to come.
Ok, have we converted you yet?
Are you as excited as we are about these plants?